It's time for a monumental post...something not about Abby. Crazy I know.
I really love reading step-by-step recipes on websites like
The Pioneer Woman Cooks and
Smitten Kitchen. There's something infinitely better about seeing the whole process photo-by-mouthwatering-photo than just a printed recipe. So here's my first step-by-step: fresh spaghetti sauce from scratch. This is what I'd call an extra-mile meal, not an every day meal. Not because it is incredibly difficult but because it takes time. I certainly don't make this sauce from scratch every time we eat spaghetti but it is a great break from the canned variety when I have some extra time and some extra tomatoes which we have in abundance right now.

This recipe is a loose guideline and I've made it with different variations, it also freezes well. The original recipe comes from Ryan's Italian side of the family, but I think I have butchered/altered the original (depending on your perspective) enough to call it my own.
Here's what you need:
About 5 lbs tomatoes, 10 cloves of garlic, olive oil, a Vidalia onion, fresh parsley, fresh basil, dried oregano, salt, black pepper, red pepper flakes, sugar, and red burgundy wine.

First you need to get the skin off of the tomatoes, so start by salting some water and get it boiling. Just eyeball the salt, maybe a tablespoon or two. You'll want the water to be about an inch deeper than your tomatoes.

Next, cut an X at the bottom of each tomato.

When that's done, cut out the stems.

After your tomatoes are ready, use tongs to drop them by batches into the boiling salt water bath.

After 30 seconds to a minute, the skins will start breaking open. When you see this happen, use your tongs to take the tomatoes out.

Run some cold water over them and they'll burst even more.

Once they're cool enough to touch, pick them up one at a time and peel the skin off. It's kind of fun. It should come off really easily. If you're having a hard time getting the skin off, pop the tomato back in the water for another 30 seconds or so. When you've got all the skin off, dump out the water, you'll use the stockpot again later.

The next part is kind of fun too. Once all of the tomatoes have their skin removed, pick up a tomato and point the top where the stem has been removed down towards the sink. Give the tomato a little squeeze. Some juices and seeds should come out as pictured at the bottom of my sink. You don't have to go all Hulk Hogan on it or you'll obliterate the poor thing. You don't need to get out every last seed. Don't be surprised if the seeds decided to bust out of the of your hand, volcanic style, causing you to scream like a little girl. Be cool.

After you've squeezed all your tomatoes, give them a rough chop. I don't really worry about the size because I like to use an immersion blender on the sauce at the end. If you don't like it chunky and you don't plan on blending it you might want to dice yours a litter finer than me.

Salt your tomatoes and set them aside. I didn't measure here either, maybe another tablespoon or so.

Next, if you have one, get out your handy dandy garlic peeler. If you don't have one, go get one, they are so awesome! If you do have one, thank your kitchen-gadget-happy mom for getting you one! But seriously, it is wonderful and can't cost more than a few bucks. All you do is stick a clove of garlic in the opening,

put your hand on top and roll back and forth a few times,

...and voila! You garlic skin is removed!

Once you've got your garlic peeled, chop it up. Don't be scared. Ten is a lot but it tastes good. The original recipe called for like 20-25 cloves. You can handle ten.

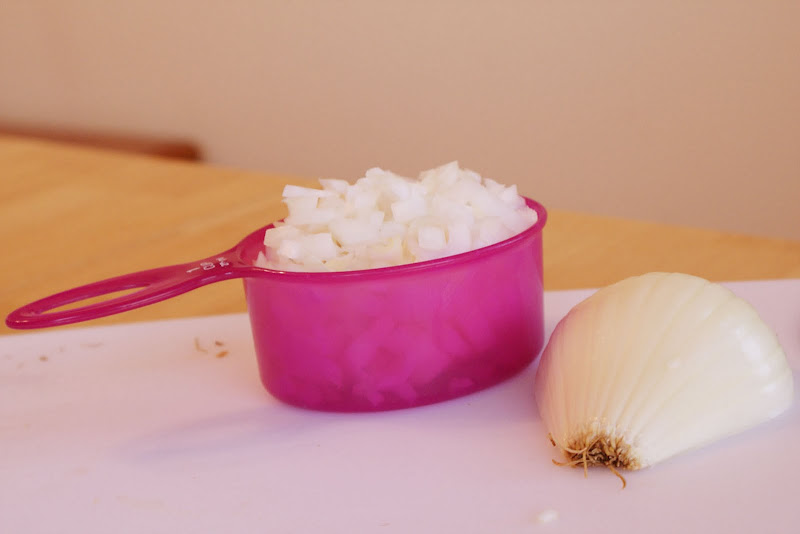
Take your Vidalia onion and chop it in half. You can use a different kind of onion but I like my sauce sweet.

I learned how to cut an onion from
The Pioneer Woman. You probably already know this trick but just in case you don't, take one half and cut slits in it almost all the way to the end, but not quite. You want the half to stay together. This picture might look backwards to you and you'll probably hold everything the opposite way but I am a lefty. Lefties do it right! Or at least that's what a pencil I used to have in elementary school reassured me.

Next, turn the onion 1/4 turn and cut the opposite way and you'll have a perfect dice.

Once you've got your onion and garlic cut up, throw them in the pot with about 1/4 cup of olive oil and saute on high heat until soft and the garlic is beginning to brown. Sorry for the horrible lighting.

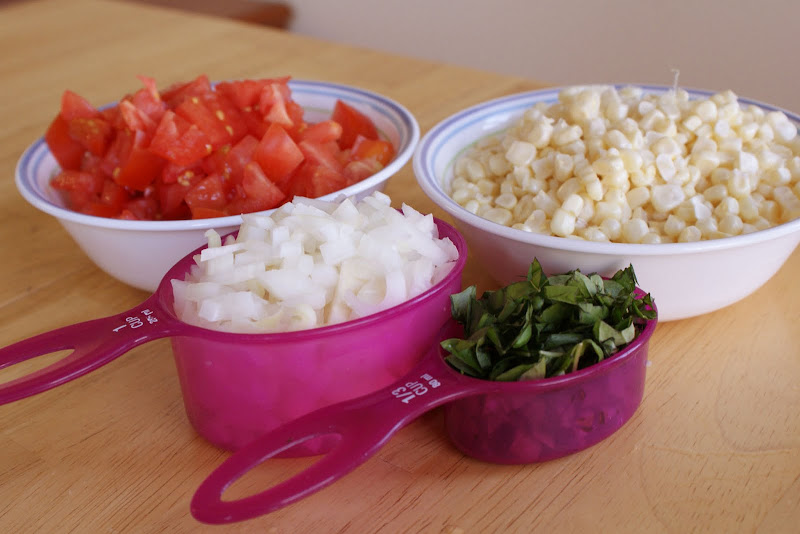
Now it's time to add the rest of the ingredients. Remember these guys?

After you dump in the tomatoes, add in your spices. I used 1 tsp salt, 1/4 tsp black pepper, 1/8 tsp red pepper flakes, 1 tsp oregano, 1 cup fresh cut parsley and 1/3 cup fresh cut basil. If you don't have fresh herbs, don't sweat it. Dried work well too, and I'd use about 1/4 cup dried parsley and 4 tsp dried basil.

Mix that up and then add the remaining ingredients: 1 tbsp sugar, 1/3 cup red burgundy wine, and 1/3 cup olive oil. We don't drink or keep alcohol in our house so I use red cooking wine available in any grocery store.

Mix it all up and let it simmer for at least two hours. The longer the better. The original recipe calls for 5-6 hours but I usually don't have that much time. Stir every 30-45 minutes. Monitor the thickness. If you like the way it is, keep the lid on. If you want it to thicken up, simmer with the lid off. I usually leave the lid off for most of the time.

If you don't like chunky sauce like my hubby, use an immersion blender to even out the consistency. If you don't have one you could puree a batch or two in the blender and pour it back into the pot.

Pour over spaghetti noodles (we love angel hair), garnish with Parmesan cheese and basil, and serve. Mmm...

As I mentioned before, this recipe is flexible. You can use canned tomatoes and dried herbs if you don't have fresh ones. You can add tomato paste to thicken the sauce. You can also add other garden vegetables like peppers and mushrooms, however I tried to add a red bell pepper one time and it tasted funky so I don't recommend that. The original recipe called for a bottle of clam juice which I left out this time because you don't really miss the flavor and it cuts down on the cost.
Here's a
printable version of the recipe. Enjoy!
 First, spread butter on two pieces of bread. Then place them butter side down into your sandwich maker.
 Next, spread some sauce on top. This is a great kid job.
 After that, sprinkle enough grated cheese on the sandwich to cover up the sauce. You could add pepperoni or anything else you want but when I'm camping I'm kind of a minimalist, so for me, less is more.
 Now here is the only semi-complicated step in the whole process. Hook the ends of the press together and then snap it shut quickly without spilling your cheese.
 Then you hook the little latch and pull it up toward the handle so it doesn't get hot in the fire.
 Then stick them in the fire and cook for a few minutes on each side.
 I can't really give you an exact time but err on the side of being underdone as you can always stick them back in if not grilled enough for your liking.
 Then carefully take them out and serve!
 So there you have it! Let's be honest, you don't really need a printable recipe for this one. You can also make these on your stove top to add variety at lunch time. I think you might be able to make these in a foil packs while camping if you didn't want to invest in the sandwich makers. I'd be really interested to know the results if anyone tries it.


